From a freshly installed server to your first migrated device — every step, in order, with the why behind each one. Configure the platform, prove it works on test devices, then expand at the pace your project needs.
PowerSyncPro is a single platform with two products: DirSync for directory synchronisation and Migration Agent for workstation migrations.
Migration Agent is built on top of DirSync, so when you install PowerSyncPro you get both — same server, same admin console, same database. Migration Agent handles the device side; DirSync runs underneath to map users between source and target. Migration Agent has moved tens of thousands of workstations across hundreds of projects — including 9,000 in a single 24-hour window.
Eight steps, plus a preparation phase up front and a testing checkpoint in the middle. The path takes you from a fresh server to a migrated device — configure, validate, deploy, migrate — with the migration guides covering the specifics for your scenario.
A high-level view of what each step involves. Provide your email address to see the full article.
Architecture Advisor BETA
Not sure which components you need?
Answer a handful of questions about your source, target, and migration goals — the Architecture Advisor will return a tailored Bill of Materials, recommend any agents you'll need (Sync, Password, Proxy), and point you at the matching migration guides.
A high-level view of what each step involves. For exact field values, sequencing, and edge cases for your specific scenario, follow the migration guide that fits your source and target.
⚙
Prepare your environment
PowerSyncPro doesn't run in isolation — your migration's success depends on the endpoint and identity infrastructure already in place around it. The platform's own prerequisites are covered in the install step; what follows is the wider environmental groundwork that decides whether migrations land cleanly. A non-exhaustive list of things to confirm before you start:
Target environment readiness — the single biggest predictor of a smooth migration. Before running any PowerSyncPro migration, provision a fresh test device directly into your target environment using your standard process (Autopilot, manual Entra-join, AD join — whichever applies). Confirm it lands cleanly: enrolment or domain-join completes, policies behave correctly, applications deploy, and the user can sign in and be productive. If your target isn't ready for fresh devices, it won't be ready for migrated ones.
Uninterrupted connectivity for migrating devices — during migration, the agent briefly puts the device into a workgroup-joined state and then reaches out to complete the target join. The device needs continuous access to both the target environment and your PowerSyncPro server throughout the entire migration window. Confirm Wi-Fi profiles, VPN configurations, and any always-on connectivity tooling will keep the device online — a dropped connection mid-migration can leave the device in a pending state, without reporting its progress.
EDR / AV on the endpoint — confirm exclusions for the Migration Agent on every device that will migrate, in whichever endpoint protection product you run (Defender, CrowdStrike, SentinelOne, etc.). Aggressive policies can interfere with profile repermissioning during migration. EDR / antivirus symptoms and resolutions →
Source EDR cleanup — if your migration involves replacing endpoint tooling between source and target (a common pattern in tenant-to-tenant moves), the Runbook's pre- and post-migration script hooks are designed for exactly that kind of cleanup. Run the source EDR's removal command pre-migration; install and register the target EDR post-migration.
Policies — review GPOs (and the target's equivalents) that apply to migrating devices, particularly anything that would conflict between source and target.
Management plane — if you're moving between management tools (SCCM, Intune, one Intune tenant to another), confirm that enrolment profiles and compliance policies are configured for the target. For SCCM source environments specifically, you may need to uninstall the SCCM client ahead of migration via a startup script — the SCCM client can interfere with management-plane transitions. Common Intune enrolment issues →
Autopilot — if you rely on Autopilot, confirm deployment profiles and group assignments in the target, and plan the workflow for moving hardware-hash registrations if you're changing tenants.
These elements are outside the scope of PowerSyncPro and require domain-specific expertise. If you'd like hands-on help getting the environment ready, our PowerSyncPro partner network includes consultants experienced in running these projects end to end.
Time commitment. PowerSyncPro is quick to install, configure, and test — usually a matter of hours. The longer pole in any migration project is preparing the environment, communicating with users, and handling change management — so plan calendar time accordingly.
1
Install the PowerSyncPro server
The platform runs on a single Windows server. Pick the path that fits your environment — each lands you with a working PowerSyncPro server, ready to configure. A single server can host migrations for multiple customer environments, which makes it well-suited to MSP and consulting deployments.
Option A
Azure Marketplace image
Deploy a pre-built appliance VM from the Azure Marketplace. Comes with Windows Server, SQL, IIS, and PowerSyncPro already installed — first RDP login walks you through certificate setup.
Run a single PowerShell script on a Windows Server (2016+). The script installs all prerequisites — IIS, SQL Express, .NET 8, ARR — and configures the certificate of your choice.
Follow the Installation Guide step by step. The most flexible path — full control over SQL placement, service accounts (including gMSA), certificate handling, and existing infrastructure integration.
Best for: custom or large-scale deploymentsTime: varies
The PowerSyncPro server needs to be continuously reachable by the Migration Agents on each endpoint, and — if you're pulling in remote directories — by the Remote Sync Agents in those networks. Three things to configure: a DNS A-record, an SSL certificate, and the right inbound ports.
Certificate Pick one — trusted certificates are strongly recommended for almost every scenario
Recommended
Trusted certificate (BYOC)
Bring a PFX from any commercial certificate authority — a purchased SSL certificate or your corporate wildcard. Endpoints and remote agents trust it automatically without any extra distribution work. The right choice if your organisation already owns or prefers to source its own SSL certificates.
Best for: orgs with existing SSL or wildcard infrastructureRenewal: manual, on your CA's schedule
Recommended
Let's Encrypt
Free, auto-renewing certificates supported out of the box by both the Azure Marketplace image and the Automated Install script. The fastest path to a working trusted certificate for anything internet-facing — endpoints and remote agents trust it automatically, and renewal is hands-off.
Best for: the fastest path to a trusted certificateRenewal: automatic
Limited use
Self-signed certificate
Supported, but requires distributing the certificate to every endpoint and remote agent that connects to the server. Only sensible for entirely internal deployments where you control every machine that will reach the PowerSyncPro server. Do not deploy the trust by policy — disjoining from your source domain during migration can remove the policy and break the agent's connection back to the server mid-migration.
Best for: isolated/internal-only deploymentsTrade-off: manual cert distribution
DNS. Set up an A-record pointing at the PowerSyncPro server (e.g. psp.company.com). Endpoints and agents will use this hostname when they register and check in.
Ports. The PowerSyncPro server is reached inbound by Migration Agents on endpoints and — if you're using them — by Remote Sync Agents in off-network directories. The table below covers the default ports involved:
Port
Direction
Used by
When
TCP 443
Inbound to PowerSyncPro server
Migration Agents, Remote Sync Agents
Always
TCP 80
Inbound to PowerSyncPro server
Let's Encrypt validation
If using Let's Encrypt
TCP 5001
Inbound to PowerSyncPro server
Remote Sync Agent
Trusted networks only
TCP 5001 only applies if you're running a Remote Sync Agent, and should be restricted to the trusted networks where those agents live — never exposed to the public internet.
Migration Agent traffic (TCP 443) can be fronted by a reverse proxy (Azure App Proxy, Cloudflare, NGINX) or a WAF if your organisation requires it — PowerSyncPro doesn't care how the request reaches the server, as long as it does. Sync Agent traffic (TCP 5001) is different: it uses gRPC, which most reverse proxies and WAFs don't proxy cleanly. We recommend exposing 5001 directly to the trusted networks where Remote Sync Agents live, rather than putting it behind a proxy — unless your proxy explicitly supports gRPC.
Plan for the server to be reachable from where the endpoints are
PowerSyncPro recommends the server be reachable from the public internet, fronted by your normal SSL and proxy/WAF posture. The Migration Agent needs continuous connectivity to the PowerSyncPro server throughout the migration — and that window includes a brief period where the device's trust state changes (source domain → workgroup → target). Always-on VPNs that depend on device trust, SSO posture, or domain membership often can't survive that transition, leaving the device in a pending state, without reporting its progress.
If exposing the server publicly isn't an option, a reverse proxy that's reachable from your endpoints' networks (Azure App Proxy, Cloudflare Tunnel, NGINX) works — but plan carefully around any VPN that re-authenticates as device identity state changes mid-migration.
Not sure which agents you'll need (and therefore which ports apply)? The Architecture Advisor takes a few inputs about your environment and returns the list of components — Sync, Password, Proxy — that fit your migration.
Tell PowerSyncPro about the directories it's going to read for source and target identity information. A migration always has at least two — a source and a target — and the connections you create here are how every later step finds them. You'll configure one connection for your source and one for your target; the options below apply to each side independently, since source and target may have different shapes (AD vs Entra) and different network postures.
What the directories give you, in practice:
Devices — imported so PowerSyncPro can register agents (only devices your directory knows about can register) and so you can scope Batches by device. Typically from the source.
Users — imported on both sides so the sync profile can match each source user to a target user. This builds the Translation Table that the Migration Agent uses to repermission profiles, files, and settings during migration.
If either side is in GCC High, the App Registration setup differs slightly from a commercial tenant — see the GCC High KB article for the exact path. Also linked at the bottom of this step.
Unsure which approach is right for your environment? The Architecture Advisor walks through the decision factors and points you at the best fit.
For an Active Directory side Source or target — pick the approach that fits each side's network and security posture
Option A
Direct line of sight
PowerSyncPro reads from your AD using a read-only service account. Least privilege, minimal moving parts. Best when the PowerSyncPro server can reach a domain controller directly over the network.
Best for: standard environmentsAccount: read-only AD service accountProtocol: LDAP/LDAPS (389/636)Import: users, groups, computers
Option B
Off-network with Remote Sync Agent
For forests PowerSyncPro can't reach directly, or scenarios where AD credentials can't leave the customer network. The Remote Sync Agent runs inside that network with a local read-only service account; the PowerSyncPro server communicates with it over TCP 5001.
Best for: disconnected forests, M&A, MSP engagementsAccount: read-only, stays on-premisesProtocol: LDAP/LDAPS (389/636) locally; gRPC over TCP 5001 to serverImport: users, groups, computers
For an Entra side Source or target — one required configuration
Required
Entra App Registration
An app registration in the tenant grants PowerSyncPro the Microsoft Graph permissions it needs to read users and devices. Each tenant (source and/or target) needs its own, consented separately by an administrator of that tenant. The KB walks through the exact permissions and consent flow.
Permissions: Microsoft Graph (read)Consent: by tenant adminProtocol: HTTPS to Microsoft EntraImport: users, devices
For directory reads in online migrations, a read-only service account is sufficient on both source and target — Match Only sync profiles don't write back, and the AD join itself is handled by a separate Runbook-level credential with computer-create rights (configured later in step 7, in Device State).
For Offline Domain Join, however, the directory connection's service account also performs the domain join itself — pre-creating the target computer account and generating the offline join blob. In ODJ scenarios, the target directory connection's service account needs computer-create rights in the target OU, not just read. This applies whether the directory connection uses direct line of sight or a Remote Sync Agent.
Tenant-to-tenant scenarios need two Entra connections (one per tenant). The migration guide for your scenario tells you exactly which connections you need and what permissions each requires.
Don't forget the Bulk Enrolment Token (when Entra is the target)
A BPRT is a token issued by Microsoft that authorises new devices to join your Entra tenant during enrolment. PowerSyncPro uses it to Entra-join migrated workstations on your behalf. Generate the BPRT in your target Entra tenant only — the source tenant doesn't need one. After you've created and saved your target Entra directory, open it in edit mode and generate the BPRT; without it, devices won't be able to Entra-join.
BPRT generation can fail in some environments depending on tenant policies. The KB has a dedicated article on common BPRT issues if you hit a wall: Common BPRT issues.
This is where DirSync earns its keep — even if you only care about workstation migration. The sync profile creates the Translation Table: the mapping between each user's source identity and their corresponding target identity. Under the hood, this is a SID-to-SID translation that Migration Agent uses during migration to repermission profiles, files, and settings on the device, so the new account inherits all the existing access. No translation entry, no repermissioning — this step matters for nearly everyone.
For workstation migration you'll want a Match Only profile: read-only on both directories, with nothing created, modified, or deleted. It just builds the mapping. How you match is the decision below.
Matching strategy How source objects are paired with target objects — pick the approach that fits your data
Simpler path
Match by attribute
Pair users on a single attribute whose value is consistent across source and target — for example, sAMAccountName, mailNickname, employeeID, or a custom attribute your environment populates reliably. Works when no transformation is needed at sync time.
Best for: source and target with consistent attribute valuesCommon attributes: sAMAccountName, mailNickname, employeeID
Build matching logic that combines multiple attributes, applies conditional rules, or transforms source values before comparison. The right home for domain transformations — for example, user@oldcompany.com in the source matching to user@newcompany.onmicrosoft.com in the target (same local part, different domain) — and any case where source and target schemas don't share a clean common attribute. Common for tenant-to-tenant, domain renames, and M&A.
Best for: domain renames, schema mismatches, M&ATrade-off: requires careful testing
When a matching profile isn't really needed. If your migration is doing only app reset or Entra disjoin — anything that doesn't touch the user's local profile — there's nothing to translate. No SID-to-SID mapping is needed because no files or settings are being repermissioned. In those cases you can use the same directory as both source and target in the sync profile, and the matching strategy doesn't matter.
Pick an approach you can rely on for every user you plan to migrate. If a user can't be matched — values differ, attribute is missing, expression doesn't apply — they won't end up in the Translation Table, and they won't have their profile migrated when their device runs. The migration guide for your scenario calls out which strategies fit that path.
About later directory changes. Once the Translation Table is built, you can safely change target-side identity attributes — including UPN reassignment after a domain transfer between tenants — without breaking in-flight migrations. PowerSyncPro performs the actual matching via GUID under the hood, so attribute changes after the table is populated don't invalidate the mapping.
Starting the scheduler. Once the sync profile is in place, head to the DirSync tab → Schedule and start the scheduler — this is what triggers the first Import / Sync cycle and populates the Translation Table. You may see "No Licence for Domain" against the Export step — that's fine for workstation migration. It just means the target directory isn't licensed for export operations, which a Match-Only profile doesn't perform anyway. More on this.
Check the Translation Table — users not in it won't be migrated
In the admin console, go to Migration Agent → Translation Table and confirm that every user you plan to migrate appears with the correct mapping. Users who aren't in the Translation Table won't have their profiles migrated — they'll log into a fresh profile under their new account on the target side, without their files, settings, or browser state.
If users are missing or mapped incorrectly, the Single Object Report and Message Logs are the right tools for chasing it down. Fix the underlying matching problem in the sync profile, re-run the sync, and re-verify before you start migrating.
This is where you tell PowerSyncPro what a migration looks like and which devices are part of it. These are two separate concepts, and they're both worth understanding clearly because they're paired in every migration you run.
Runbook — the "what"
A Runbook contains the instructions the agent will execute on the device: which directory to leave and which to join, how user profiles and files should be repermissioned, what to do with installed applications, and any custom pre- or post-migration scripts.
Most projects only need one primary Runbook. Reuse it across early-adopter, pilot, and main migration waves rather than creating a new one for each. Once a Runbook has run successfully on a computer, it won't run again on that computer.
A Batch defines which devices are in scope for a migration and the time windows in which they're allowed to migrate. You attach one or more Runbooks to a Batch, and each Runbook within the Batch has its own timing.
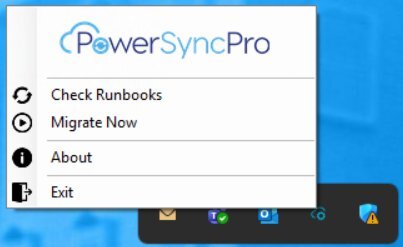
The two key dates — Available From and Enforced After — are set per Runbook within the Batch. Available From is when migration becomes possible (the user can start it themselves via the Migrate Now option in the PowerSyncPro Migration Agent tray icon). Enforced After is when migration becomes enforced (the agent runs migration whether or not the user has acted). Because each Runbook has its own dates, you can put a prerequisite Runbook and a main migration Runbook in the same Batch with different schedules. A device should only ever be in one Batch at a time.
Two patterns are used to schedule migrations. A self-service migration with a deadline opens migration up to users early so they can start it themselves via the Migrate Now option in the PowerSyncPro Migration Agent tray icon — most migrate at their own pace, and Enforced After catches the rest. A Big Bang waits until administrators are ready, then fires migration for everyone in the Batch at a coordinated moment. The Available From and Enforced After dates can be set to reflect either pattern. Which one fits depends on how much coordination your project needs, and the migration guide for your scenario will recommend the right approach.
A tour of the Runbook editor
The Runbook editor opens with general properties at the top, then six tabs of detailed configuration. Here's what each surface controls and the kinds of decisions that live there. For exact settings and the values that fit your scenario, follow the migration guide and the Configuration Guide PDF linked at the bottom of this step.
Name, Source Directories, Target Directory
The Runbook's display name, the directory connections it reads users and devices from (can be more than one source), and the single directory it writes to.
Allow on Server OS
Off by default. The Runbook can only be executed against Windows Server hosts if this is enabled — workstation migrations leave it off to make sure a Runbook can't run on a server that shouldn't be migrated this way.
Prerequisite Runbooks
Other Runbooks that must have completed on the same device before this one will run. Useful for the ODJ Cache User Credentials pattern, and for the OneDrive "Make Files Cloud Only" prep ahead of a main migration — both rely on a prerequisite running days or weeks earlier.
Startup
User Interaction
How visible the migration is to the end user — silent in the background, progress dialogs that walk them through each phase, or somewhere in between.
Migration In Progress Image
What replaces the lock screen while migration is running. You can supply your own image for branded migrations.
Set Legal Notice
Whether to show a legal notice message to users who try to sign in to a device that's currently mid-migration. The text is configured on the User Experience tab.
Prevent Login
Whether migrating users are added to the Deny Logon list — the safety net that stops a user signing in mid-migration and breaking their profile. Independent of Set Legal Notice; both checkboxes can be toggled separately.
Admin Fallback account
A local admin account created for troubleshooting and recovery during migration. Automatically cleaned up after a configurable number of days.
Pre-migration script
Optional script that runs on the device before migration begins — useful for environment-specific preparation steps.
User Experience
Branding and messaging
Company name, logo, support contact, custom instructions — everything the user sees during the migration window.
Legal notice text
The message users see if they attempt to log in during migration (when Set Legal Notice is enabled on the Startup tab).
QR codes and help links
Optional pointers from the on-screen messaging to your help portal, KB, or support form.
Multilingual dialogs
Every dialog the user sees during migration — prompts, countdowns, lock-screen messaging, the success notification — can be localised per language. There's also a simulator for previewing the localised dialogs before you run a Runbook, so you can check the wording in each language without a real migration.
Which directories the device is removed from at migration time. Options: None, Entra, Active Directory, or All Directories (removes from both AD and Entra).
Domain Join
What the device joins on the target side. Options: None, AD, or Entra. PowerSyncPro doesn't have a separate "Hybrid" option — a hybrid join is the result of joining a device to an AD that's already configured for hybrid join via Entra Connect, and Windows handles the Entra side of that automatically.
Rename Computers
Whether to rename the device during migration. Off by default; useful for environments where computer names follow a target-specific convention. Computer name supports %SERIAL% and %RAND:X% placeholders.
Offline Domain Join (AD target only)
For devices that can't reach a target domain controller at migration time. Requires a Cache User Credentials step run in a Prerequisite Runbook ahead of migration day, plus a trust between source and target domains so credentials can be cached. Most projects don't need this — only enable it when devices genuinely won't have target-DC connectivity.
Cache User Credentials (set via Prerequisite Runbook)
The companion to Offline Domain Join — caches each user's target credentials onto the device ahead of migration so the offline join can succeed. Configured in a Prerequisite Runbook that runs before the main migration; its specific options live on the User Experience tab.
AD target sub-settings (when Domain Join = AD)
When the target is AD, several additional settings appear: Computer Account Org Unit (the OU devices are joined to — leave empty if the directory's default OU is fine), Reuse Existing Computer Account (use a pre-staged account if one exists, otherwise create a new one), and a set of Domain Join credentials — a service account in the target AD with rights to join computers to that OU. This is the separate account with computer-add rights mentioned in step 3, distinct from the read-only directory connection account.
Enroll Devices to Intune (Entra target only)
Whether the device automatically enrols into Intune as part of migration. The directory connection must have a Bulk Enrolment Token (BPRT) configured for this to work — the editor shows a green confirmation indicator when one is in place. Enrolment runs hourly until successful or until the agent is uninstalled. Common Intune enrolment issues →
Permission Updates
Update Permissions
Three modes: Don't update permissions, Only add permissions, and Add and remove permissions. Workstation migrations almost always want Add and remove — the source account's permissions are replaced with the target account's, leaving the device clean. The other two modes are typically used in server repermissioning projects.
Areas
Which scopes are repermissioned — Windows profiles, file system, registry, printers, services, scheduled tasks, local groups, user rights, and others. Most defaults are sensible for workstations; you'd toggle individual areas off only when you know a specific scope shouldn't be touched.
Worth calling out — Local Groups. When enabled (it is by default), a user's local group memberships are remapped to their target account. So a user who was in local Administrators or Remote Desktop Users on the source ends up there on the target with their new account, retaining the same local permissions on the device.
Areas to Ignore
Paths excluded from repermissioning — pre-populated with sensible defaults (%SystemRoot%, %ProgramFiles%, *:\System Volume Information, and others). Add to this list when you know a specific path on your devices shouldn't be touched by permission changes.
Remote Permissions
Used to repermission file shares hosted on non-Windows hosts (NAS, SAN). Typically only relevant in server migrations — see the Configuration Guide for the full setup.
Server repermissioning is a different beast
The Permission Updates tab supports configurations well beyond the typical workstation migration — repermissioning servers, file shares, and remote permissions. If your project involves any of these, work from the Configuration Guide's Permission Updates section, not from this tour.
App Reconfiguration
Microsoft app resets
Resets the cached identity state for Office, Teams, OneDrive, and Edge so they re-authenticate against the target identity instead of staying signed in to the source. Relevant when the migration changes which tenant or directory the user lives in; not needed when source and target identities are in the same tenant.
Per-app sub-options
Each application has its own sub-settings — Outlook ZeroConfigExchange, OneDrive SilentAccountConfig, Azure Information Protection host mappings, and more. The Source Tenants field for OneDrive is where you specify the GUID(s) of the source tenant(s) you want to unlink from OneDrive — without this, OneDrive can't be cleanly disconnected from the old tenant. See the Configuration Guide for the full set.
Completion
Command Packages
Powershell or batch scripts to run on the device after migration completes successfully — useful for notifying RMM tools, updating endpoint manager records, triggering BitLocker re-enrolment, or anything else that needs to happen once the device is in its new state.
Uninstall Agent
Whether the Migration Agent removes itself from the device at the end of the Runbook. Off by default — and best left that way (see callout).
Don't uninstall the agent at completion
Best practice is to leave the Migration Agent installed for a while after migration. Removing it immediately can interfere with Intune enrolment, prevent post-migration user notifications, and disable other functionality the agent provides during the days following a migration. Uninstall later via a dedicated uninstall-only Runbook, or via your software management tool (Intune, RMM, etc.) once you're sure everything's settled.
A Batch is simpler than a Runbook — general properties at the top, then a Runbooks tab and a Computers tab. Here's what lives in each.
Name, Source Directory, Target Directory
The Batch's display name, plus its single source and target directories. Note: Source Directory here is singular (a Batch ties to one source), unlike a Runbook which can read from multiple sources.
Runbooks
Attached Runbooks
One or more Runbooks attached to this Batch. Each one is shown in a list with its name and timing settings.
Available From (per Runbook)
Migrate Now option in the PowerSyncPro Migration Agent System Tray icon
When this specific Runbook becomes available to users in the Batch. The agent starts prompting the user to migrate from this point onwards. If they snooze, they can still start the migration themselves at any point via the Migrate Now option in the PowerSyncPro Migration Agent tray icon.
Enforced After (per Runbook)
When this specific Runbook becomes enforced — the agent runs migration whether or not the user has acted. Set this equal to Available From for a Big Bang. The Migration Agent runs as SYSTEM, so it doesn't need an interactive user session to start a migration — if no users are logged in at the enforcement point, migration begins within 15 minutes.
Timezone (per Runbook)
Either Local (evaluated against each device's local clock) or UTC. Local-to-device works for self-paced migrations where users run the migration during their own working day; UTC works when you want everyone to migrate at the same wall-clock moment regardless of where they are.
Multiple Runbooks per Batch
Because each Runbook has its own dates, you can put a Prerequisite Runbook (e.g. OneDrive Cloud Only prep) and the main migration Runbook into the same Batch — the prerequisite runs earlier, the main runs later, all on the same set of computers.
Computers
Computer selection
Either an inclusion list ("Only these computers" — explicit opt-in) or an exclusion list ("All computers except the following" — opt-out). Useful for both pilot Batches (small inclusion list) and catch-all Batches (broad exclusion list).
Adding computers
Computers can be added one at a time via the Add Computer dropdown, or in bulk via CSV import. The list can also be exported as CSV — useful for keeping records or porting between environments.
Prerequisite Runbooks for large OneDrive caches. Migrating a device with a large OneDrive cache can dramatically lengthen migration time. A common pattern for tenant-to-tenant projects is a Prerequisite Runbook scheduled days or weeks ahead of the main migration: a second, simpler Runbook with only "Make OneDrive Files Cloud Only" enabled, running early enough that all files are cloud-resident by migration day. This dramatically shortens the actual migration window. See Configuration Guide for the full Prerequisite Runbook setup.
Everything up to this point — install, directories, sync profile, Runbooks, Batches — can be done without a licence. The licence is what lets you actually migrate a device. That includes testing: real migrations on test machines require a real licence, which is what trial licences are for.
What you need a licence for
Migration Agent — required to migrate a device. Workstation migration projects only need this.
DirSync — only required if you're using DirSync to export data to a target directory (creating, updating, or synchronising users). The match-only sync profile that powers the Translation Table for workstation migration doesn't need a DirSync licence.
What you'll need when you order
Licences are scoped to a specific device count and to your specific source and target domains. Have these ready:
Your device count
Your source domain — Active Directory FQDN (e.g. company.com) for AD, or onmicrosoft.com tenant domain for Entra
Your target domain — same shape, for the target side
How to apply it
Your licence arrives as a single string. In the admin console, go to Global Settings → Licences, paste it in, and save.
Trialling? Trial licences are full keys for a limited number of devices. Get in touch with sales to request one.
Test in two phases, with a real expectation that you'll iterate between them.
Two things to create in the admin console first
Before installing the Migration Agent on any device — even one test machine — set up these two items in the admin console. They're what the agent uses to identify and authenticate itself to the server, and they're reused for both testing and fleet rollout:
Migration Agent certificate. A private certificate generated inside PowerSyncPro that secures the channel between each endpoint and the server. Different from your public-facing SSL certificate from step 2 — this one lives only inside PowerSyncPro.
Pre-shared key (PSK). A short string the MSI uses to register itself with the server during install. You'll pass it in as one of the MSI parameters.
Phase A — Representative devices
Take a small set of devices that match the shape of your real fleet (same Windows builds, same management state, same line-of-business apps). Run the Migration Agent against them manually using your Runbook. Confirm the profile carries over, the user can sign in, the device joins the target cleanly, and your post-migration validation passes.
Yes, the agent needs to be on the test devices. Testing requires the Migration Agent MSI installed on each test machine — that's how it picks up the Runbook and does the work. Install it manually, or scope a small deployment to just your test devices. This is the same MSI you'll push fleet-wide in the next step; the difference is scope, not method. Holding off on the fleet-wide push until after testing is what protects your end-user devices from a Runbook you haven't yet proven.
Speeding up the test loop. By default, the Migration Agent checks for new work hourly, and also immediately on first install — so if you add a device to a Batch before the install completes, it'll pick up its first Runbook on that initial check. If you add a device to a Batch after install and want a faster test, click Check Runbooks on the PowerSyncPro Migration Agent tray icon on the user's computer to push a check immediately rather than waiting for the next hourly cycle.
Phase B — Pilot batch on real users
Once Phase A is clean, create a small Batch of real users — IT first, then a friendly business group — and run them through the same Runbook with real user prompts and the actual timing windows you'll use in production. This validates the end-user experience, the comms, and the support flow as well as the technical migration.
If anything surprises you in either phase, fix it in the configuration and re-test. If something doesn't behave the way you expect and it's not obviously a config problem, open a support ticket — our team is well used to debugging this kind of edge case.
7
Deploy the Migration Agent
Now that you've proved the configuration works on representative hardware, push the Migration Agent to your endpoint fleet. The agent is a small Windows service that sits dormant on the device until a Runbook tells it to act, so deploying it ahead of time is safe. You already created the Migration Agent certificate and the pre-shared key for the test phase — they're reused as-is for the fleet rollout.
Intune (Line-of-Business MSI app) — recommended — the simplest path for modern, cloud-managed fleets. Upload the MSI as a LoB app, supply the install command-line arguments below, and target device groups (not user groups).
SCCM / MECM — well-suited to traditional or hybrid AD environments. Use the Application model so you get detection rules and reporting; deploy to a pilot collection first.
PDQ / RMM / PowerShell — flexible automation for mixed fleets and MSP engagements. The MSI is silent-installable and can be wrapped in any deployment tool; the KB has a ready-made PowerShell template.
Manual install — fine for small fleets, pilots, lab testing, or war-room migrations.
Group Policy (GPO) — supported but with significant limitations: install runs only at system startup, requires DC contact before user logon, and has no built-in retry or detection. Configuration values can't be passed as command-line arguments, so a custom MST transform is required (the KB has a script to generate one). Use only when nothing else fits.
However you deploy, the MSI takes two parameters at install time: URL (your PowerSyncPro Agent registration endpoint, e.g. https://psp.company.com/Agent) and PSK (the pre-shared key you generated above). The agent uses these to register itself with the server. Verbose MSI logging is strongly recommended on every deployment method — see the KB for the exact arguments.
The MSI ships in two flavours — with and without .NET bundled. Use the self-contained one if you're not sure your endpoints have the right .NET version; use the slim one if you control your fleet and know they do.
One thing worth knowing. For an agent to successfully register, its computer object must already exist in the PowerSyncPro database. The MSI install can happen any time, but registration won't complete until directories have been added (step 3) and a sync profile has imported the computers (step 4). Many teams deploy the MSI well in advance of migration so it's quietly ready as soon as imports start running. After install, users will see the PowerSyncPro Migration Agent tray app appear on their device — it sits silent until the agent is included in an active Batch.
When a device is in a Batch and inside its migration window, the agent picks up the Runbook and runs the migration. If a user is logged in, they see a small set of guided screens; if not, the agent runs the migration as SYSTEM in the background — no interactive session needed. Under the hood, PowerSyncPro changes the device's directory join state, repermissions the user's profile and files using the Translation Table, handles BitLocker and Windows Hello reset, and reconfigures applications as defined in the Runbook.
The migration completes across several reboots. User profiles, settings, and files are preserved — when the user logs back in with their target account, their desktop, documents, browser bookmarks, and installed apps are where they left them. Most users describe the experience as seamless; many don't realise the device has moved directories at all. After migration, the agent stays dormant on the device — useful if you ever need to run a follow-up Runbook on the same hardware.
Migration progress and per-device logs surface in the admin console under Agent Logs. PowerSyncPro also writes to the device's Application Event Log, which is the first place to look when troubleshooting on the machine itself.
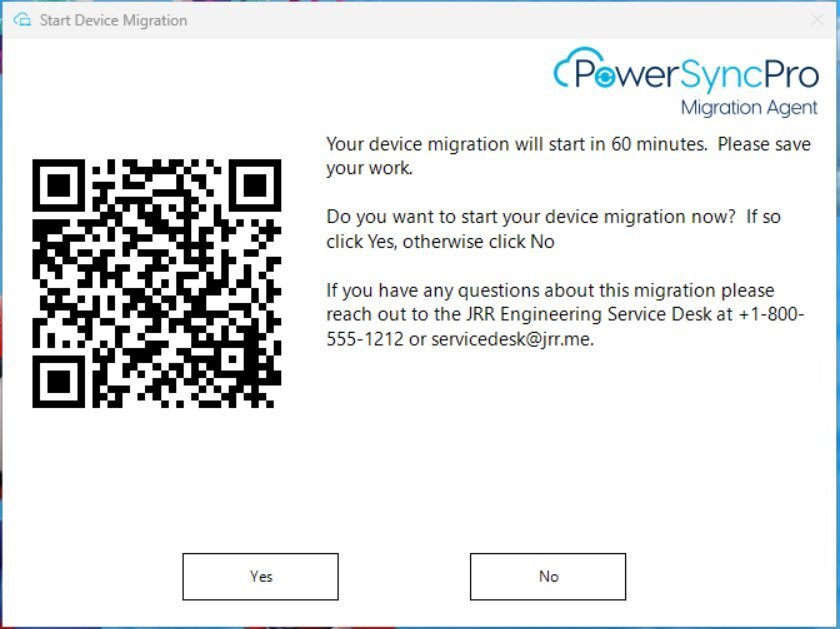
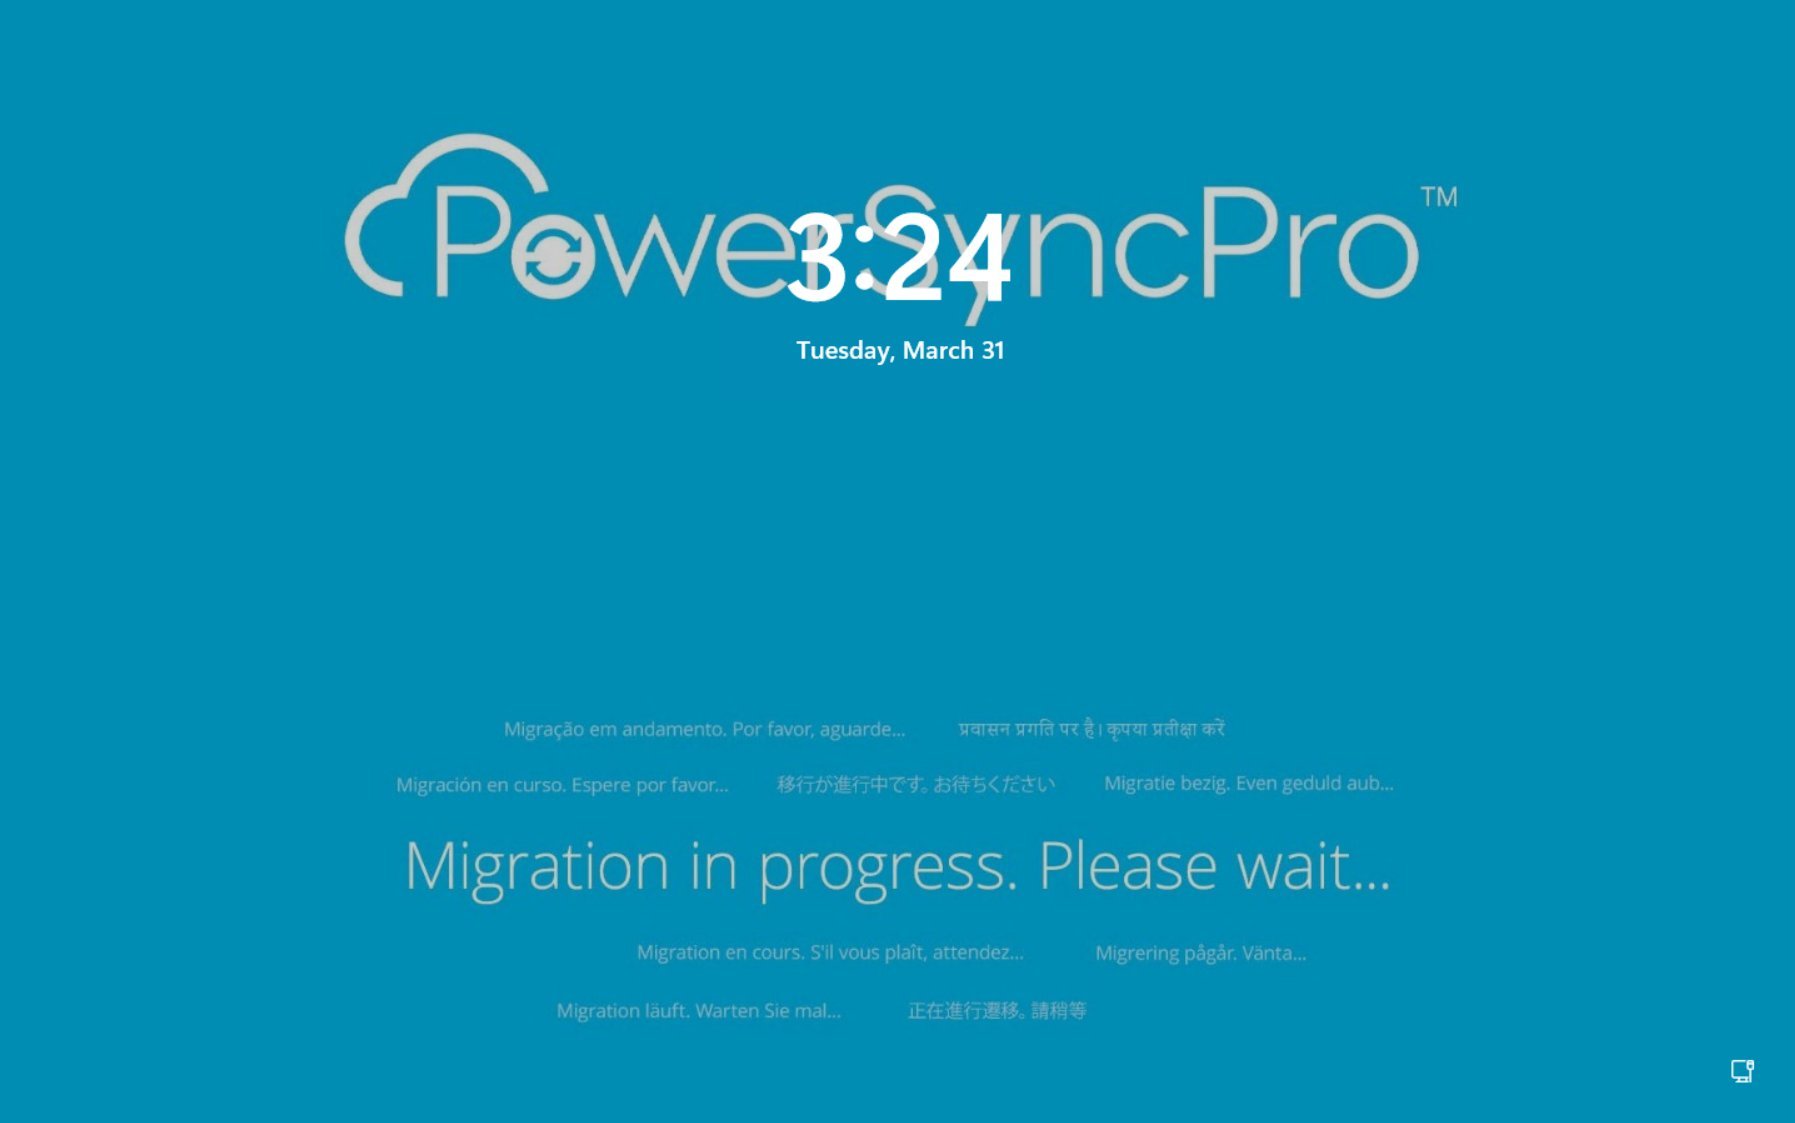
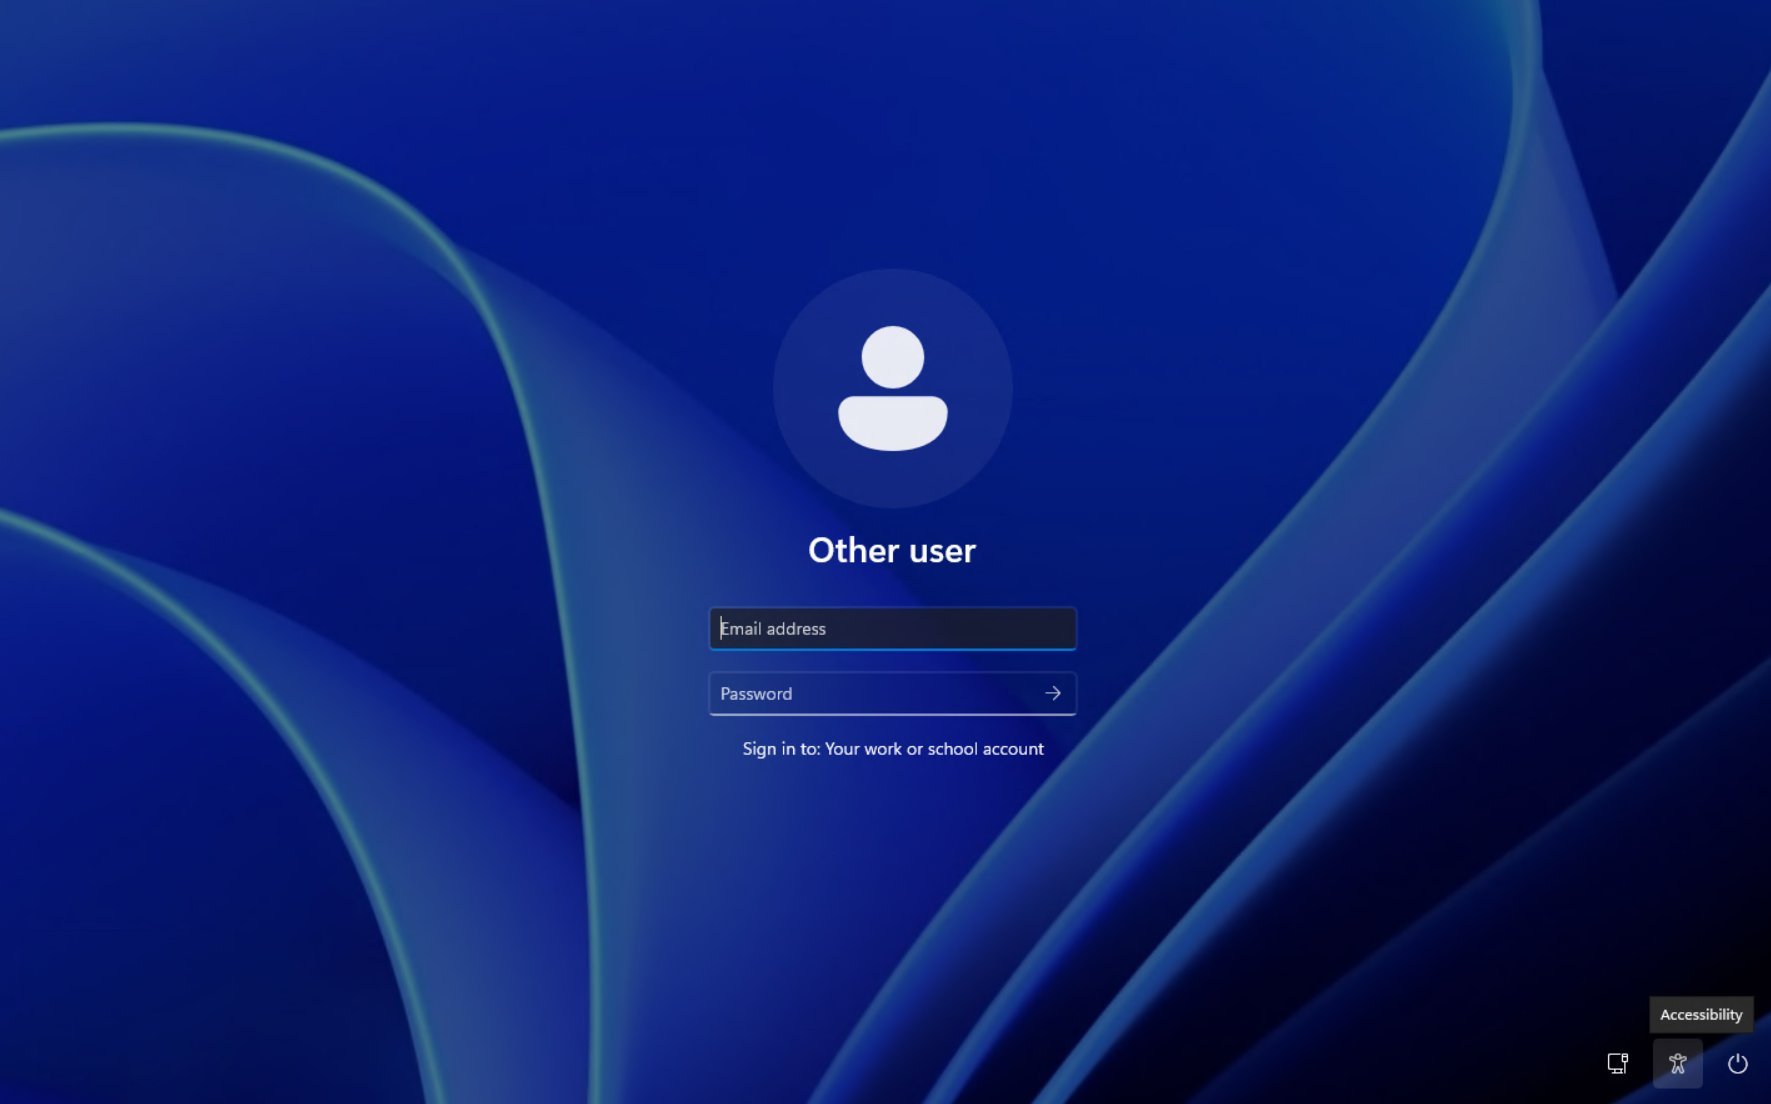
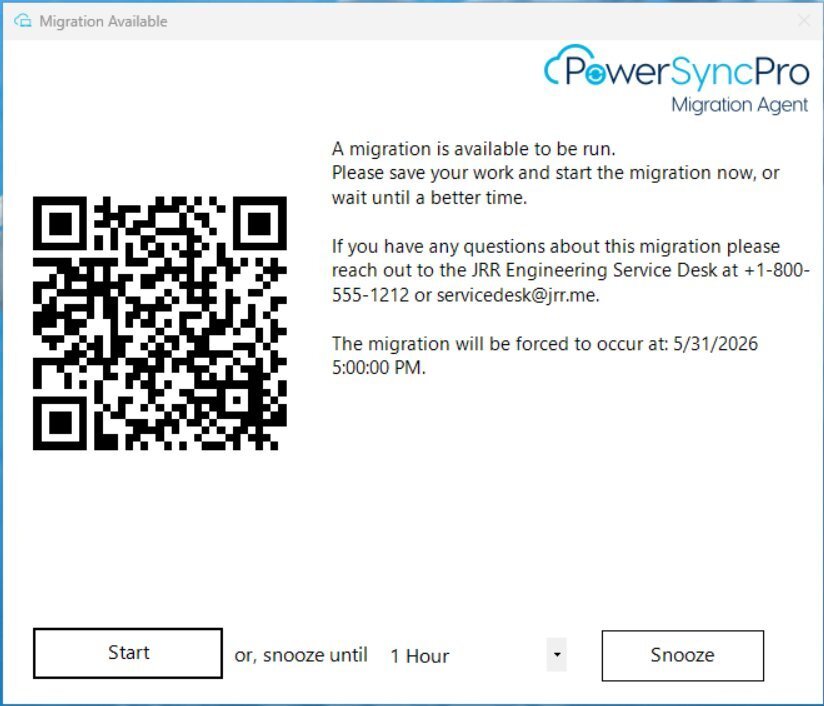
The Migration Agent keeps users informed at every step. Below is the sequence a typical user moves through during a migration — these screens are configurable, localisable, and brandable to your organisation.
Read the right migration guide for your source/target, open the Architecture Advisor for a tailored diagram, or get in touch with our team — and we'll help you get from where you are to running pilots.